Introduction#
ClearMap is a toolbox for the analysis and registration of volumetric data from cleared tissues.
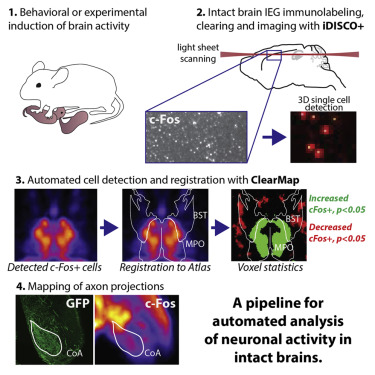
ClearMap has been designed to analyze terabyte-sized 3D datasets obtained via light sheet microscopy from iDISCO+ cleared tissue samples immunolabeled for proteins.
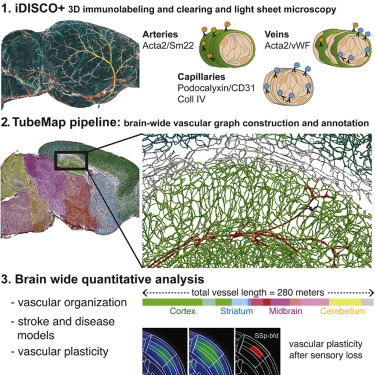
ClearMap has been written for mapping immediate early genes [Renier2016] as well as vasculature networks of whole mouse brains [Kirst2020]


ClearMap tools may also be useful for data obtained with other types of microscopes, types of markers, clearing techniques, as well as other species, organs, or samples.
ClearMap is written in Python 3 and is designed to take advantage of parallel processing capabilities of modern workstations. We hope the open structure of the code will enable many new modules to be added to ClearMap to broaden the range of applications to different types of biological objects or structures.
Installation#
Computing Resources#
The processing with CellMap and TubeMap is best done on local workstations or a cluster. We use high performance workstations from DELL or HP with at least (for reasonable performance): * 256GB RAM * 12 CPUs * 24GB VRAM * Fast SSDs, NVMe preferred in a RAID0 configuration * For the vasculature analysis pipeline, a recent nVidia GPU with >= 24GB VRAM is required
The workstations were operated by Linux Ubuntu 18.04LTS or later.
Getting ClearMap#
ClearMap currently runs on Linux, although some parts might work on Windows. For this tutorial we assume you are using a recent version of Ubuntu Linux.
The required software packages for Linux are build-essential, git and recent proprietary nVidia drivers if you plan on using the vasculature analysis pipeline.
We recommend installation via Miniconda although you can also install the dependencies manually.
The steps are as follows:
Download Miniconda3
Install anaconda for Python 3 for your OS and install it following the installation instructions.
Clone ClearMap from git
Trigger the installation (which creates the environment…)
Please follow the steps below for simple installation from the terminal.
cd /tmp
wget https://repo.anaconda.com/miniconda/Miniconda3-latest-Linux-x86_64.sh
bash Miniconda3-latest-Linux-x86_64.sh  # follow the instructions
source ~/.bashrc  # reload the bashrc to activate conda
git clone https://github.com/ChristophKirst/ClearMap2.git
cd ClearMap2
chmod +x install_gui.sh
./install.sh -f ClearMapUi39.yml
Attention
The installation script will create a new conda environment called ClearMapUi39. The compilation of the ClearMap modules will take some time (about 15 minutes).
Tip
The GUI installation script automatically creates a .ClearMap directory in your home directory. This directory contains the main settings file and the default configuration files for the ClearMap GUI. You can modify the settings in the .ClearMap directory to match your system configuration. The settings file is best edited through the preferences dialog in the ClearMap GUI.
Note
Although ClearMap ships with the required libraries and should work out of the box,
you can still configure some paths for ClearMap by editing the
Settings.py file.
See Settings.
Running#
You can now run ClearMap by activating the ClearMap environment and starting the UI:
conda activate ClearMapUi39
clearmap-ui
Alternatively, you can run the ClearMap scripts directly from your IDE, see:
Scripts.
Before running, modify the parameters and filenames to match your data and analysis.
Deprecated since version 2.1.0: The two main scripts TubeMap and CellMap are now deprecated. Please use the new_api versions instead
You can also use jupyter to run ClearMap. Our tutorials notebooks (CellMap notebook or TubeMap notebook) are good starting points…..
