Menu Sample#
Source -> Raw images paths -> Atlas space info -> Resolutions
Source tab#
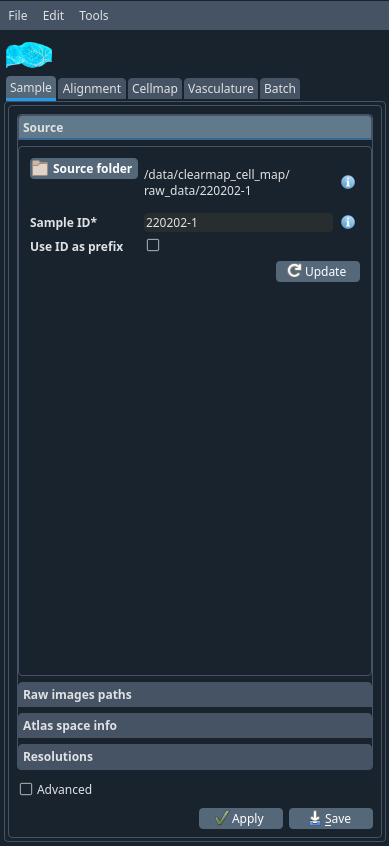
- Source folder
This should be the main folder of the sample, not the sub-folder containing e.g. the raw data as all files will be read from and saved to this folder.
Select the folder where you have both autofluorescence (1x) and the raw (e.g. cFos) (4x) data folders for a brain.
- Sample ID
The ID of the sample. write the name of your sample this is the identifier for the sample. Any string (ideally short) containing alphanumerical characters and underscores. It is important that this ID remains unique within a study as this will be used to identify samples in the summary.
Click on the update button. If you already have the config files, it will automatically retrieve your sample’s name. If not, it will ask you if you want to get some config files by default. Accept it.

For cell detection, choose CellMap as your data analysis type, for vasculature, choose TubeMap. If you have mixed data, you can select Both.
You will get the following files in your source folder:
alignment_params.cfg
cell_map_params.cfg
sample_params.cfg
errors.html
info.log
Raw images path tab#
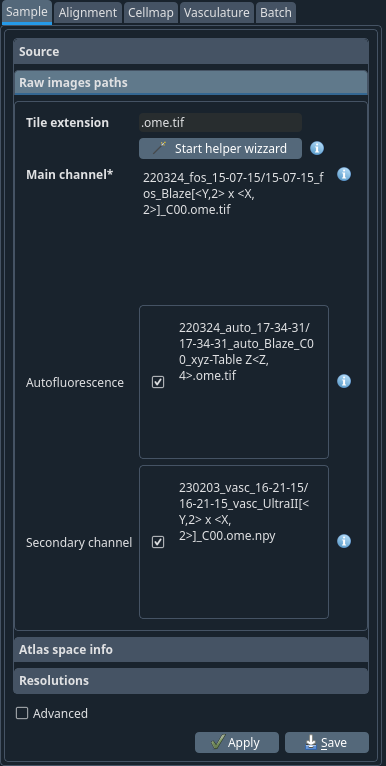
- Tile extension:
.ome.tif The file extension of the individual tiles. This is used by the helper wizard to search for the images.
- Start helper wizard
Launch the paths helper wizard popup window. This will open a new window with a wizard to help you construct the patterns for the paths.
- For each channel:
Select what type this channel is (autofluorescence, raw,…) [1]
- For each group of digits highlighted as question marks, select the
corresponding axis from the drop-down menu.
Click Validate.
Once done, click Apply.
- Main channel
The main channel colour of your sample. This is usually the channels with cells or vessels.
- Autofluorescence
The reference channel. This is the channel that will be used for atlas alignment.
- Secondary channel
Secondary data channel
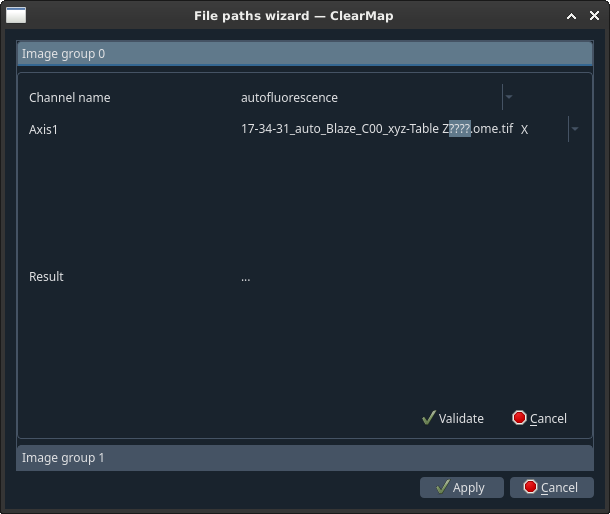
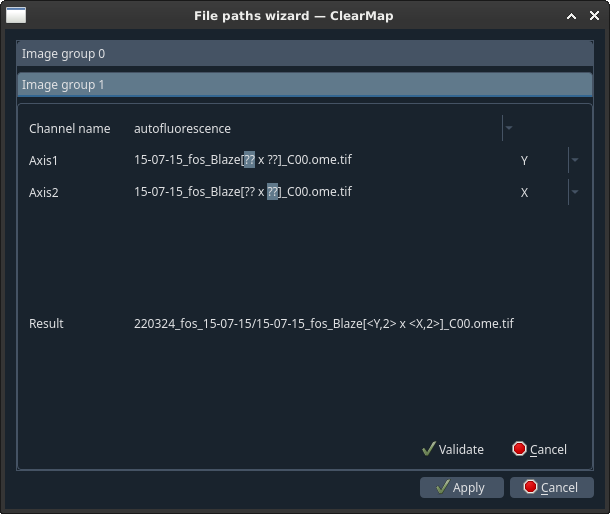
Helper wizard (new pop window)
The autofluorescence channel should be 1x The raw channel should be 4x You can confirm it by checking the objective used
After clicking Apply, the channels should be automatically updated.
Atlas space info tab#
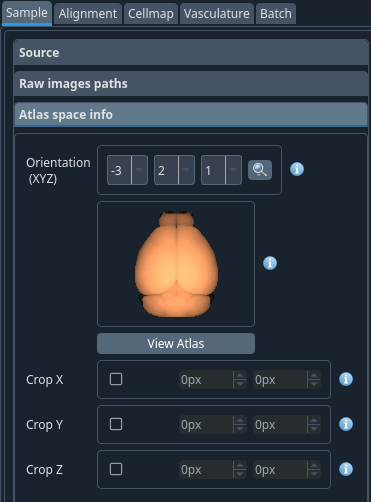
- Orientation (XYZ)
The order in which are represented the X, Y and Z channels. The orientation (XYZ) of your sample based on the orientation you put on the microscope when compared to the Allen Brain Atlas. Once selected, click on the magnifying glass to view the result. This is a sketch of the sample as it was oriented during the scan. Example: Orientation -1 2 3
Note
A minus sign indicates an inversion of the axis direction.
Warning
Do not select the same order for multiple axes.
How to crop the atlas along the axes to match the sample.
Crop your image if you only acquired part of the brain (e.g. half an hemisphere). In case where you would be scanning half a brain, it is a good idea to leave a bit more than the midline to improve alignment. Leave the axes that were not cropped un-ticked.
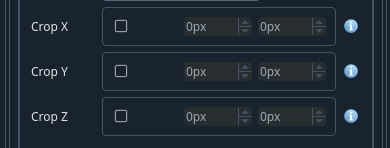
- Crop X
Select as appropriate from the the reference atlas
- Crop Y
Select as appropriate from the the reference atlas
- Crop Z
Select as appropriate from the the reference atlas If you have only half hemisphere, you would typically cut at 270 px in z
Note
Values are in pixels. To select the appropriate values, click on the open atlas button.
Resolutions tab#
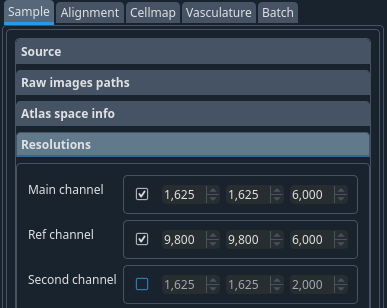
Resolution of the raw dataset. This is the physical size of a voxel in um. These values depend on the microscope and the step size you are using to image.
Tip
- Planned development
in future versions, leaving this unselected while the channel is enabled in the paths tab will make the software read the value from the metadata.
Note
To be sure you can check these values on FIJI. Take the first image (that is where the metadata is stored) from your autofluorescence channel -> load it on FIJI, go to Image -> Show info -> Pixels ID -> Physical size -> Get the info
Once all the values have been entered for the sample tab, click Apply. You will then be prompted to “Convert individual tiles to npy for efficiency ?” this will create a copy of the tiles in the python .npy format. It will make the stitching process a bit faster but use more space on the hard drive.